English
  한국어
한국어

Contact resistance on a high-voltage DC contactor directly affects its efficiency and safety. When resistance exceeds the manufacturer’s specified limit—typically around 0.2 mΩ to 0.5 mΩ for new units—it can cause overheating, voltage drop, or contact welding. Regular testing using a micro-ohmmeter or a voltage-drop method under controlled conditions tells you whether cleaning or replacement is needed. This article explains the test steps, acceptable thresholds, and the signs that indicate a contactor has reached the end of its reliable service life.
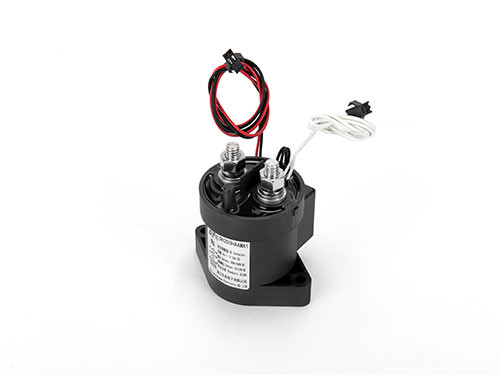
Why contact resistance matters in a DC contactor
Contact resistance refers to the electrical resistance at the junction of the mating contacts when the contactor is closed. In high voltage DC applications—such as battery packs, charging stations, or energy storage systems—even a small increase in this resistance leads to:
- Localized heating (I²R losses)
- Voltage drop that may affect system performance
- Accelerated contact degradation from arcing
- Risk of nuisance tripping or failure to carry rated current
Regular resistance checks are essential for preventive maintenance and safety compliance. Industry practices recommend baseline measurements at commissioning and periodic checks thereafter.
Tools needed for accurate contact resistance testing
Accurate measurement requires a micro-ohmmeter or a DC current source with a millivolt meter. The recommended test current is usually 10 A to 100 A DC depending on the contactor’s current rating. Typical tools include:
- Four-wire (Kelvin) micro-ohmmeter
- Calibrated current clamp (for the voltage drop method)
- Clean, secure connection leads
- Personal protective equipment (PPE)
Using a standard multimeter’s resistance range is not acceptable, because the test current is too low to detect small resistance changes reliably.
Step-by-step contact resistance test procedure
- Isolate and lock out all power. Ensure no voltage is present across the contactor.
- Visually inspect the contactor. Look for signs of overheating, cracks, or carbon dust around the terminals.
- Manually close the contactor (if a test button is available) or apply rated coil voltage to close it safely.
- Connect the current leads to the main terminals on one side and the opposite side of the contacts.
- Connect the sense leads as close as possible to the contact body, avoiding the power connection joints.
- Inject the test current (often 10 A or 100 A, as stated in the contactor’s test specification). Wait for the reading to stabilize.
- Record the resistance value and compare it against the manufacturer’s datasheet. Also measure voltage drop if desired.
- Repeat for all poles if it’s a multi-pole unit.
Always refer to the product’s technical manual for specific test currents. For example, a DH200H model may have a specified contact resistance measured at 100 A. You can review the technical specifications for such details.
Interpreting the test results
| Condition | Typical resistance range | Action |
|---|---|---|
| New contactor | 0.1 – 0.2 mΩ (depending on rating) | Record baseline. |
| Normal operation | ≤ 0.5 mΩ (or within manufacturer tolerance) | Continue monitoring. |
| Elevated but stable | 0.5 – 1.0 mΩ | Inspect and clean contacts if possible; schedule next test sooner. |
| Exceeds maximum limit | > 1.0 mΩ or visible increase >50% from baseline | Replace contactor or contacts. |
These ranges are indicative; always use the values provided by the original manufacturer. If the datasheet is unavailable, a contact voltage drop exceeding 100 mV at rated current generally warrants further investigation.
When to replace a high voltage DC contactor
Contact resistance alone isn’t the only factor. Consider replacement when:
- Resistance exceeds the upper limit specified in the datasheet.
- Contact voltage drop at full load surpasses the acceptable threshold.
- Visible contact erosion or pitting covers more than 30% of the contact surface.
- The contactor fails to open or close within the specified time.
- The unit has reached its stated electrical endurance cycles, even if performance still seems acceptable.
- Insulation resistance between contacts and coil has decreased below safe levels.
In many cases, replacing the entire contactor is more reliable and safer than attempting to refurbish contacts in the field—especially for sealed units that use inert gas for arc quenching.
Preventive maintenance checklist for contact resistance management
- Record baseline contact resistance at commissioning.
- Test every 6–12 months, or according to the equipment duty cycle.
- Keep terminals clean and torque connections properly.
- Monitor operating temperature via thermal imaging.
- Investigate any sudden rise in resistance immediately.
- Verify coil power consumption; an increase may indicate mechanical binding.
- Maintain a logbook with dates, test current, resistance values, and actions.
Frequently Asked Questions
- Q1: Can I measure contact resistance with the contactor still in the circuit?
- No. The test must be performed with the circuit completely de-energized and the contactor isolated to avoid parallel paths that distort readings.
- Q2: What test current should I use?
- Typically 10 A for small contactors (20–50 A rating) and 100 A or the rated current for larger units (100 A and above). Always follow the manufacturer’s test recommendation. Check the product category to find the test specifications for each model.
- Q3: Is high contact resistance always caused by contact wear?
- Not always. Loose busbar connections, oxidation on terminals, or insufficient contact pressure can also cause high readings. Clean and retorque connections before concluding the contactor itself is faulty.
- Q4: How often should I test contact resistance on an EV charging station contactor?
- For frequently operated contactors (multiple cycles per day), testing every 6 months is common. Critical infrastructure may require more frequent checks.
- Q5: What happens if I continue using a contactor with high contact resistance?
- Overheating can damage the contactor housing, melt insulation, and potentially cause a fire. In DC systems, sustained arcs are especially destructive.
- Q6: Can contact resistance be repaired, or is replacement always necessary?
- On open-frame contactors, contacts can sometimes be cleaned or polished. However, for sealed, gas-filled high voltage DC contactors, replacement is the only safe option once contacts are degraded.
Conclusion
Contact resistance testing is a straightforward but essential procedure to determine the health of a high voltage DC contactor. By following a consistent measurement routine and knowing the manufacturer’s acceptable limits, you can avoid unexpected failures and plan replacements before downtime occurs. Always cross-reference your measurements with the official specifications for your specific model. If readings indicate an upward trend or exceed safe thresholds, it is time to discuss replacement options and review the available configurations that match your system requirements.